How did you use new media technologies in the construction and research, planning and evaluation stages?
The programmes/sites we used in each stage of the film making process, and how they were used:
Research:
Blogger - Blogger was once again used here to show how we were researching our band and their image, and also to show how we were reseaching our video, for example uploading posts containing images of things we researched to give a rough idea of how our video would look.
Wikipedia - This was particularily useful in researching our band, the Prodigy, finding out key things relevant to the bands image (e.g. names of albums, instruments used etc), but also provided us with the neccessary information to contact the band's record label (Cooking Vinyl) to ask for copyright permission to use the track we wanted.
Twitter -We used twitter as a way of find out out all about the bands audience, who followed them etc. and also the things the band stood for by what they were tweeting about. By looking at who follwoed the band, we were able to get a good idea of who our target audience would be looking, looking at what they wear through they're images, and the thigns of itnernet to them, by reading both the 'About Me' section, and their tweets.

Google - we used Google a lot in the research, particularily for the digipak and advert research, looking at images of example adverts and band logos, looking at digipaks from similar artists, so we knew what kind of thing to create, and opposite artists, so we knew what to avoid.
Planning:
Blogger - we used this as our online diary to each individually keep a record throughout the whole process (it was used to record and show evidence of our planning - e.g. the storyboard was uploaded onto this, as well as a list with our initial ideas etc.)
Powerpoint - We used lots of powerpoints in the planning stage of production. They were used as a clear, concise way in which to show our ideas and give a visual idea of how they would look.

Google - The search engline was key to the planning stage. I used it to find images of how I wanted my idea to look, and also as a way of sourcing props we might use.
Mobile Phone - This was used when we looked at initial locations for our first idea (in the wood). We took photos of the setting and uploaded them from our mobiles to blogger. We also used our phones to take photos of shots we might choose to feature in our video (placing someone in the position with the shot where we would wnat to see them, then capturing it on our phones).

Photoshop - Photoshop was used as a tool to create a band image for the chosen band. We took photos of the people we wanted to cast, and then imposed their faces onto bodies wearing the clothes that we would be likely to dress them in. Although the end result looked a little bit odd, it gave a rough idea of how they might look. We also used it in creating our graphic design for the front cover of our digipak and advert, and we created a variety of designs to choose from. We used the Selection tool to cut bits from different images and add them together, but in a very basic way as we did not want to spend tolong creating the image of the band on Photoshop.

Youtube- We used Youtube as a way of listening to songs that fit to the ideas we had come up with. Once we decided on the idea, we then brainstormed bands and artists which would be likely to have a similar themed video, and listened to a selection of their songs through Youtube, before finally deciding on 'Warriors Dance.' We also used Youtube as a way of sourcing other ideos which looked like we felt ours wanted to, for example, the Smirnoff advert, which we were able to take screenshots of.

Ebay - Whilst most of our props were supplied by the school, the animal masks were something that they didn't have, so we used Ebay to purchase as many masks as we needed at a cheap cost. I typed in 'animal masks' and was able to szource them quickly and efficiently, using PayPal to pay for them.
Construction:
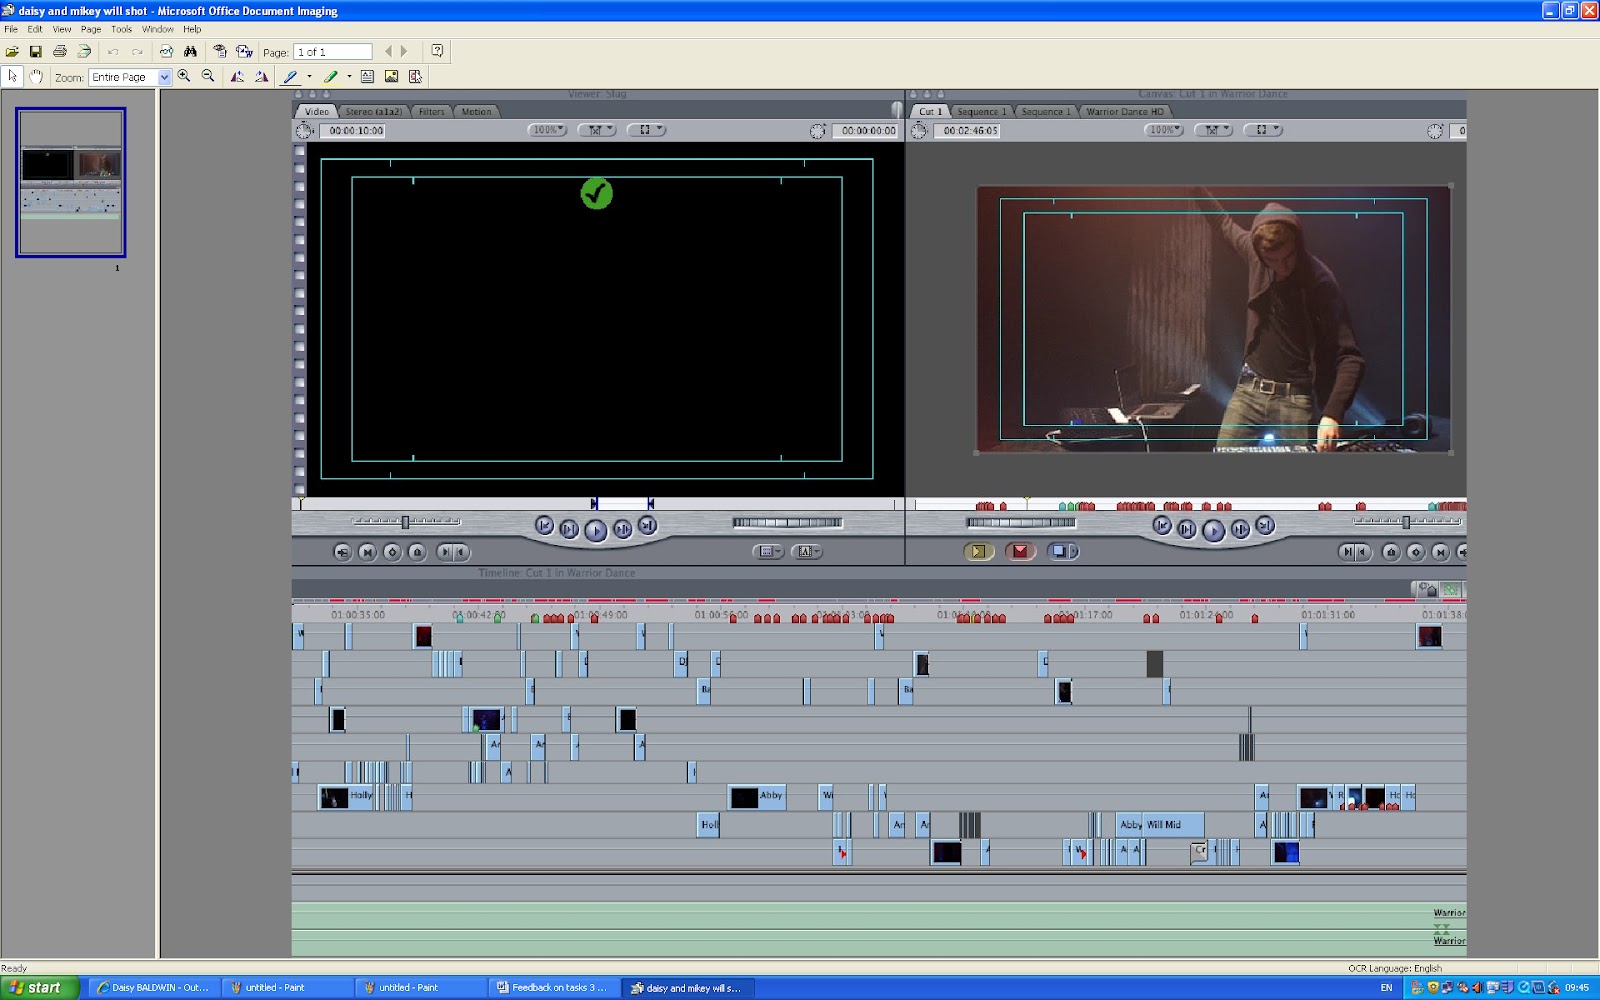
Final Cut Pro - This was the main program that we used during the construction of the video. It was what put the whole video together, as it was our only editing tool used for the video. The advanced technology of the program enabled us to create jump cuts, mirror images and blurred effects to give our video the 'trippy' effect we had researched, such as 'Earthquake' and 'Mirror'. It is enabled us to create a smooth transition between the shots as we were able to overlay the shots to prevent a blank shot.
The program's advanced technology was perfect for editing our video - in order to cut shots you need only drag the mouse to where you want to cut the shot, which was quick and easy to do. We also used the tools 'Modify', 'Sequence' and 'effects'. This was to edit the look of some shots we were not happy with, layer over cool effects to really emphasis the message of our band and ensure that the video ran smoothly together.


Photoshop - We used Photoshop as the key tool to create our digipak and adverts. It was a brilliant program to use, due to its flexibility. We were able to change and edit our image, add text for the poster, and refine things. It meant that unlike designing the ancillary texts by hand, we wouldn't have to start from scratch if we decided we didn't like something. We used the range of tools, such as 'Layer' to add and experiment with different backgrounds, 'Filter' to alter the colours, contrast and intensity of the image. We used the 'T' button to overlay our text, which we sourced from a site called 'Urban Fonts'. The 'Eyedropper Tool' was also particularily useful in making sure our colours all matched throughout the digipak, as we were able to extract colour form certain areas (e.g. the lips, and put this colour into other areas of the advert and digipak).

Evaluation:
Powerpoint - I used this in my first evaluation task as a way of clarly presenting how my products challenged and conformed to media conventions. It enabled me to present information alognside screengrabs. Via the toolbar at the top I was able to add pictures easily via 'Insert', and text using the Text Box button.
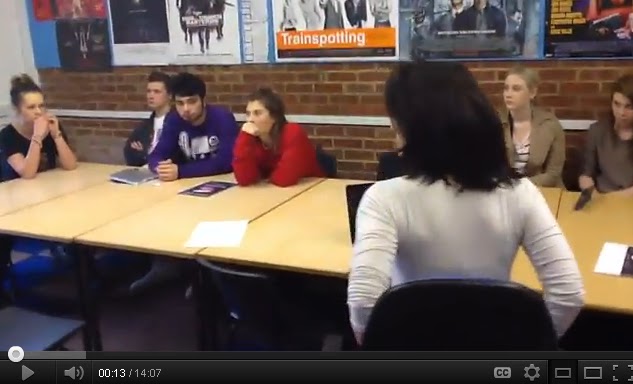
iPad - We used this to film our focus group, as it gave a better quality picture and sound than a mobile phone would, and was also then easily uploaded on to Youtube, because it was already connected to the internet.

Blogger - Firstly, I used Blogger to look back at all my posts from this unit, in order to complete the evaluation tasks to the best and most accurate ability possible. I also used it to display my powerpoints and posts summarising and evaluating
Scribd - I used this online program to put my powerpoint presentation on to Blogger for my first evaluation task as I couldn't get Slideshare to work. It was useful to use a different program because it added a new look to the presentation of powerpoints on the blog, giving the overall look variety. It was very easy to use, I only had to create an account which took a few minutes, and then upload my powerpoint ot the site. I was then provided with an Embed code, which I simply added to my blog.
The programmes/sites we used in each stage of the film making process, and how they were used:
Research:
Blogger - Blogger was once again used here to show how we were researching our band and their image, and also to show how we were reseaching our video, for example uploading posts containing images of things we researched to give a rough idea of how our video would look.
Wikipedia - This was particularily useful in researching our band, the Prodigy, finding out key things relevant to the bands image (e.g. names of albums, instruments used etc), but also provided us with the neccessary information to contact the band's record label (Cooking Vinyl) to ask for copyright permission to use the track we wanted.
Twitter -We used twitter as a way of find out out all about the bands audience, who followed them etc. and also the things the band stood for by what they were tweeting about. By looking at who follwoed the band, we were able to get a good idea of who our target audience would be looking, looking at what they wear through they're images, and the thigns of itnernet to them, by reading both the 'About Me' section, and their tweets.

Google - we used Google a lot in the research, particularily for the digipak and advert research, looking at images of example adverts and band logos, looking at digipaks from similar artists, so we knew what kind of thing to create, and opposite artists, so we knew what to avoid.
Planning:
Blogger - we used this as our online diary to each individually keep a record throughout the whole process (it was used to record and show evidence of our planning - e.g. the storyboard was uploaded onto this, as well as a list with our initial ideas etc.)
Powerpoint - We used lots of powerpoints in the planning stage of production. They were used as a clear, concise way in which to show our ideas and give a visual idea of how they would look.

Google - The search engline was key to the planning stage. I used it to find images of how I wanted my idea to look, and also as a way of sourcing props we might use.
Mobile Phone - This was used when we looked at initial locations for our first idea (in the wood). We took photos of the setting and uploaded them from our mobiles to blogger. We also used our phones to take photos of shots we might choose to feature in our video (placing someone in the position with the shot where we would wnat to see them, then capturing it on our phones).

Photoshop - Photoshop was used as a tool to create a band image for the chosen band. We took photos of the people we wanted to cast, and then imposed their faces onto bodies wearing the clothes that we would be likely to dress them in. Although the end result looked a little bit odd, it gave a rough idea of how they might look. We also used it in creating our graphic design for the front cover of our digipak and advert, and we created a variety of designs to choose from. We used the Selection tool to cut bits from different images and add them together, but in a very basic way as we did not want to spend tolong creating the image of the band on Photoshop.
Youtube- We used Youtube as a way of listening to songs that fit to the ideas we had come up with. Once we decided on the idea, we then brainstormed bands and artists which would be likely to have a similar themed video, and listened to a selection of their songs through Youtube, before finally deciding on 'Warriors Dance.' We also used Youtube as a way of sourcing other ideos which looked like we felt ours wanted to, for example, the Smirnoff advert, which we were able to take screenshots of.

Ebay - Whilst most of our props were supplied by the school, the animal masks were something that they didn't have, so we used Ebay to purchase as many masks as we needed at a cheap cost. I typed in 'animal masks' and was able to szource them quickly and efficiently, using PayPal to pay for them.
Construction:
Final Cut Pro - This was the main program that we used during the construction of the video. It was what put the whole video together, as it was our only editing tool used for the video. The advanced technology of the program enabled us to create jump cuts, mirror images and blurred effects to give our video the 'trippy' effect we had researched, such as 'Earthquake' and 'Mirror'. It is enabled us to create a smooth transition between the shots as we were able to overlay the shots to prevent a blank shot.
The program's advanced technology was perfect for editing our video - in order to cut shots you need only drag the mouse to where you want to cut the shot, which was quick and easy to do. We also used the tools 'Modify', 'Sequence' and 'effects'. This was to edit the look of some shots we were not happy with, layer over cool effects to really emphasis the message of our band and ensure that the video ran smoothly together.


Photoshop - We used Photoshop as the key tool to create our digipak and adverts. It was a brilliant program to use, due to its flexibility. We were able to change and edit our image, add text for the poster, and refine things. It meant that unlike designing the ancillary texts by hand, we wouldn't have to start from scratch if we decided we didn't like something. We used the range of tools, such as 'Layer' to add and experiment with different backgrounds, 'Filter' to alter the colours, contrast and intensity of the image. We used the 'T' button to overlay our text, which we sourced from a site called 'Urban Fonts'. The 'Eyedropper Tool' was also particularily useful in making sure our colours all matched throughout the digipak, as we were able to extract colour form certain areas (e.g. the lips, and put this colour into other areas of the advert and digipak).

Evaluation:
Powerpoint - I used this in my first evaluation task as a way of clarly presenting how my products challenged and conformed to media conventions. It enabled me to present information alognside screengrabs. Via the toolbar at the top I was able to add pictures easily via 'Insert', and text using the Text Box button.
iPad - We used this to film our focus group, as it gave a better quality picture and sound than a mobile phone would, and was also then easily uploaded on to Youtube, because it was already connected to the internet.
Blogger - Firstly, I used Blogger to look back at all my posts from this unit, in order to complete the evaluation tasks to the best and most accurate ability possible. I also used it to display my powerpoints and posts summarising and evaluating
Scribd - I used this online program to put my powerpoint presentation on to Blogger for my first evaluation task as I couldn't get Slideshare to work. It was useful to use a different program because it added a new look to the presentation of powerpoints on the blog, giving the overall look variety. It was very easy to use, I only had to create an account which took a few minutes, and then upload my powerpoint ot the site. I was then provided with an Embed code, which I simply added to my blog.
No comments:
Post a Comment